Tips for How to Set Up a Home Karaoke System
Building the ultimate home karaoke system requires careful planning and selecting the right equipment. This thorough guide helps you build a professional-level setup as good as any commercial venue.
Equipment Basics
The foundation of any professional karaoke system begins with the following units:
- Dynamic microphone (Shure SM58 or its equivalent by another reputable mic maker)
- Powered speakers or PA system
- Interface or mixing console
- Audio software and player
- Well-designed XLR cables
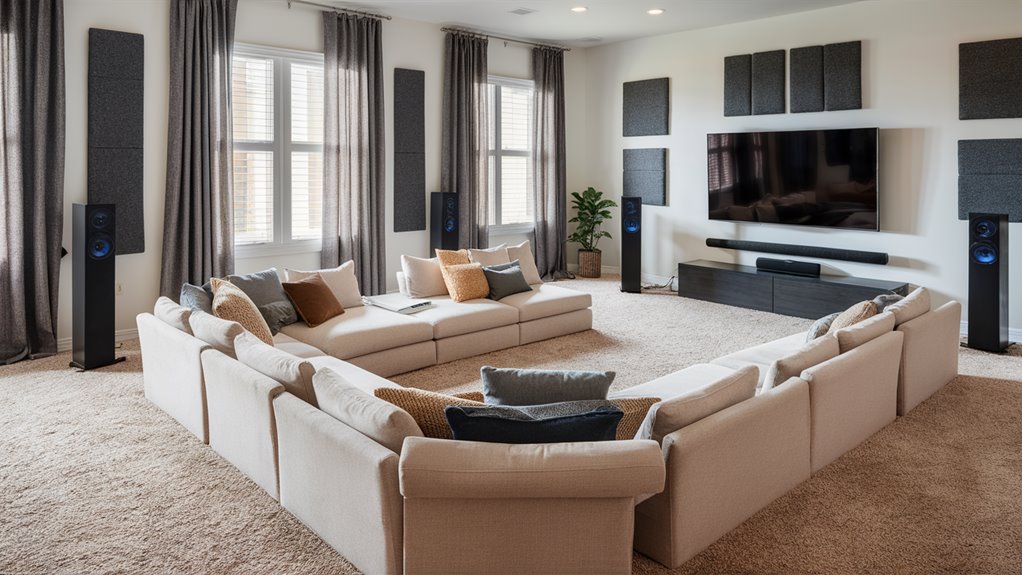
Optimum Room Setup
Once again, quality is key–in every system, audio must be top-notch:
- Speakers 8 feet apart at 45-degree angles
- Screen mounted at eye level
- Acoustic treatment installed
- Carpet or rugs put down to cut echoes
Also, sufficient ventilation must be provided for equipment.
Audio Adjustment
Set your sound settings to generate the highest quality:
- Turn the gain on the mic up to 75%
- Keep volume between 85dB-90dB
- Balance music and vocal levels
- Allow for audio compression
- A mild reverb effect can be put on top of this
Digital Library Management
Make sure your karaoke song collection is well organized:
- Sort songs by type
- Develop custom playlists
- Regularly update the library
- Retain backup files
- Have a user-friendly search system in place
Professional Cable Management
Fit together audio connections correctly for optimal results:
- Use balanced XLR cables
- Tie off all runs of wire
- Mark the connection points
- Provide proper grounding
Essential Equipment and Components
Core Audio Components of Home Karaoke Setup
The base of a good home karaoke system needs high-quality dynamic microphones.
Crystal clear vocals are guaranteed when you choose mics that come equipped with built-in noise reduction and anti-feedback technology.
Professional-grade microphone cables or wireless handset systems ensure connectivity is rock solid whenever live performances are called for.
Sound System Requirements
100+ watt per channel powered speakers form the bulk of audio output. A capable amp or PA system makes for good sound processing.
Different sources of music you can always choose from:
- Dedicated karaoke players
- With karaoke software running, a laptop
- A piece of smart app with the ability to broadcast via Bluetooth, Lighting Playback or Airplay
Such karaoke hardware is virtually the command center. To achieve accurate control, all features require a professional mixer or karaoke-specific amplifier, including:
- Marking the beat
- Up to 4 singers can program into
- Echo and reverb setting
- Sound effect
Lyrics show devices include:
- HDTV (1.3-inch screen minimum)
- Digital monitor
- Professional projection
Complete your setup with premium karaoke Best Karaoke Systems: A Complete Buyer’s Guide software or a service that requires subscriber access which has an enormous song database library together with synchronized lyrics.
The Choice of Your Karaoke System Mounting
How To Choose Your Best Karaoke
Essential Setups for the Singing Experience
Setting up your home karaoke system is a balancing act. Here are three tried-and-true setups that bring ultimate performance to the party.
TV-based Karaoke Setup
As long as your original living room system is good at all, no need to question the color and background. It has a natural screen size feel and top sound quality.
Connect your karaoke machine or laptop directly to your TV set using an HDMI cable for optimal audio-visual performance.
The microphone receiver should be arranged so that it is within 15-20 feet of the karaoke sound zone, while powered speakers are positioned at 45 degrees off-axis to give a surround-sound system effect.
Dedicated Karaoke Machine Setting
There is no external component needed when you select a complete playback system. Our stand-alone unit options include all necessary hardware for you to begin your karaoke song festoon in just moments simply by adding your favorite music in MP3 format or from xm radio channels, CDs, and other sources.
While singing, ensure that your unit is placed on a flat surface at eye level height (4-5 feet). Absolutely critical for viewing comfort. Proper ventilation around the unit should be in place so that it can work efficiently without heating up and also provide easy access to power sockets when used for long periods.
App-Based Mobile Setup
The smartphone or tablet configuration features both Bluetooth capabilities and is the most mobile.
For sing-ins, have an extra wireless handheld microphone on hand in case the main one goes out. The batteries of the standby wireless handheld should also have enough power. Microphone can be checked by talking into it and listening via earphone. The batteries for the wireless handheld should be at full charge.
Operating your studio headset microphone because the singer can even hear his own voice transmitted back at him after singing into it. The singer should not be able to hear his voice coming out of the set.
Playback a free song. Also, make sure to reproduce the latter types of lyrics on this page down clearly. When singing and dancing within 30 feet of your Bluetooth speaker system, make sure you don’t suffer from any audio dropouts.
Audio and Speaker Configuration
Build your perfect system just like the professionals do by setting up your amplifier, switcher, processor, sequencing device, recorder, and karaoke machines in a suitable configuration. For superior sound quality, place your main speakers so people up front have ear-level sound. In other words, get the speakers at 45 degrees from the person you’re singing to and his main amplifier or whatever equipment he uses for reprocessing sound recorded through this system.
System Connectivity and Performance Optimization
In setting up an installation, use balanced XLR cables to prevent combined and differential-mode interference. Multichannel mixer function makes it possible to fully implement feedback suppression in the case of mic feedback while singing. Keep volume levels within 85-90dB at your performance position, allowing adequate headroom for dynamic vocal performances whilst preserving audio clarity and preventing distortion.
Microphone Selection and Placement
Choose high-quality microphones. Using professional microphones is the cornerstone of any top-flight karaoke setup. Dynamic microphones with cardioid pickup patterns particularly suited to the task are the Shure SM58 and the Sennheiser e835. Feedback noise rejection is first-class, with their suppression even when levels of feedback are quite loud; they reproduce voice shimmeringly.
Optimum Microphone Placement
It is essential to make adjustments in microphone position to perfect detail.
Position the main vocal microphone 6-8 inches from the performer’s mouth at an upward angle for optimal sound capture.
Boom stands that can be adjusted quickly provide essential flexibility for performances by different singers and will still enable the microphone to be where it belongs.
A speaker positioned off-center will help prevent 호치민 퍼블릭가라오케 feedback problems.
Connecting Cables and Organizing Systems
Practical cable management:
Maintain a minimum 3-foot clearance between audio cables and potential interference sources, including power cords and wireless devices.
For wireless applications, UHF frequency-agile systems offer sound quality and reliability superior to VHF options. Dropouts are eliminated, and clarity is dependably maintained.
Locating, Managing, and Supplying Songs
There are many ways to obtain karaoke tunes. Here’s an example:
- Famous professional content sourcing techniques.
Make sense of your karaoke library by using digital streaming services such as Karafun and SingKing that have a large selection of tracks synchronized to the music with lyrics.
For non-cloud solutions, you may opt to use digital marketplaces like PartyTyme. These give you files in MP4 format at reasonable prices.
Where traditional systems are in use, karaoke content providers can still provide the essential CDG files.
Advanced Media Management Methods
Digital File Management
Establish a structure and order for your content, using separate folders on each hard drive according to type of music and:
- Decade
- Language
- Artist
- Vocalist
- Lyric, etc.
Database Implementation
Draw up a comprehensive song database file, listing everything in it:
- File format
- Key
- Being difficult to sing
- How your voice sounds
- How long the performance lasts
Methods of Managing Your Data
Use these backup solutions, backed up by an absolute minimum of one solid dependable external device:
- Cloud storage is incorporated into all backup systems.
- A drive mounted for the express purpose of holding backups is added to every computer that is used regularly.
- Regular backups of the entire system carried out and checked to see if they are complete and uncompromisingly thorough.
Format Conversion and Inspection
The tools used to convert songs professionally should include such assistance as:
- CDG files can be converted into MP4 format using Power Karaoke or PCDJ Karaoki.
- Audio synchronization is verified.